So, you're thinking about putting up a wood fence yourself. I get it. It seems straightforward enough, right? Dig some holes, set some posts, attach some pickets. And for some folks, it absolutely is a rewarding DIY project. But I've seen enough fence projects go sideways to tell you there are definitely things you need to know before you grab that shovel. Let's talk about what you can realistically do and when you should probably just pick up the phone.
Before You Even Think About Digging
This is where most DIYers either succeed or fail before they even start. Planning is everything, especially with a project this size.
- Know Your Property Lines: This is non-negotiable. You absolutely have to know exactly where your property ends and your neighbor's begins. Don't guess. Pull your plat survey, check with the county assessor's office, or hire a surveyor. Nothing causes more headaches (and potential legal battles) than putting a fence on someone else's land.
- Call Digger's Hotline (811): Seriously, do this. It's free, it's easy, and it's mandatory. You don't want to hit a gas line, water main, or electrical conduit. Trust me, that's a bad day. They'll mark out underground utilities, usually within a few days.
- Check Local Ordinances: Omaha has specific rules about fence height, setbacks from property lines, and even materials in some neighborhoods. For instance, if you're in an older part of town like Dundee or Aksarben, there might be historical district rules. You'll need to check with the city planning department. Don't skip this; fines are no fun.
- Talk to Your Neighbors: Even if you're well within your rights, a quick chat with your neighbors can save a lot of grief. Let them know your plans, discuss the fence's appearance (especially if it's a shared boundary), and you might even split the cost.
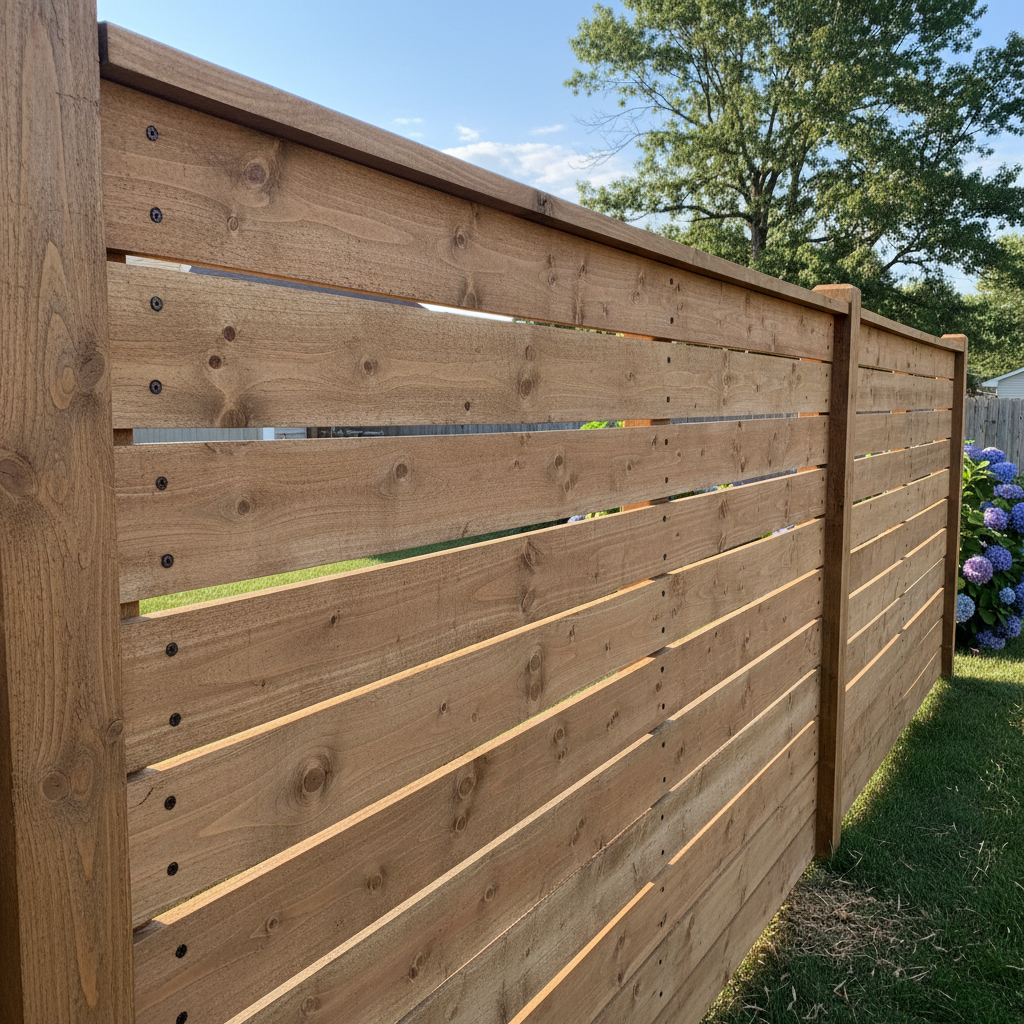
- Material Selection: Cedar is popular here in Omaha because it stands up well to our crazy weather swings – from humid summers to freezing winters. Pine is cheaper but won't last as long without religious maintenance. Think about the style too: dog-ear, flat-top, shadowbox, privacy. Pick what fits your home and needs.
During the Build: Where DIY Gets Real
Okay, you've got your permits, your lines are marked, and your materials are stacked. Now for the actual work.
- Post Holes: This is the most physically demanding part. You'll need a post-hole digger. For a standard 6-foot fence, your posts should be 8 feet long, buried 2 feet deep. In Omaha, with our clay soil, you'll want to ensure your holes are at least 8-10 inches in diameter to give the concrete a good grip. Make sure the bottom of the hole is wider than the top for a good footing.
- Setting Posts: This is critical for a straight, sturdy fence. Use concrete specifically designed for fence posts. Mix it according to directions, or use a 'just add water' mix directly in the hole. Plumb each post perfectly vertical with a level. Brace them securely until the concrete cures, which can take 24-48 hours depending on the mix and weather. Don't rush this.
- Attaching Rails: Once your posts are solid, you can attach the horizontal rails. Typically, you'll have a top, middle, and bottom rail. Use exterior-grade screws or galvanized nails. Make sure your rails are level across the span.
- Pickets: This is where your fence really takes shape. Start at one end and work your way across. Use a spacer block to ensure consistent gaps between pickets. A string line stretched along the top of your rails can help keep the picket tops even.
Now, here's the honest truth: setting posts perfectly plumb and in a straight line, especially over uneven terrain or long stretches, is harder than it looks. If you're not confident in your ability to get those posts absolutely perfect, that's a good time to consider calling in a pro. Apex Fencing Solutions, for example, has the specialized equipment and experience to get those posts set right the first time, saving you a lot of frustration and potential re-work.
After the Build: Protecting Your Investment
You've done it! Your fence is up. But the work isn't quite over if you want it to last.
- Staining or Sealing: This is super important, especially for wood fences in our climate. It protects the wood from moisture, UV rays, and rot. Do this as soon as the wood is dry enough to accept the stain – usually a few weeks after installation. It'll extend the life of your fence significantly.
- Regular Inspections: Walk your fence line a couple of times a year. Look for loose pickets, wobbly posts, or signs of rot. Catching small issues early can prevent bigger, more expensive problems down the road.
- Keep it Clean: Don't let vines grow on your fence or allow sprinklers to constantly hit it. Excess moisture is wood's worst enemy.
Building your own fence can be a really satisfying project. But be realistic about your time, tools, and skill level. If the thought of digging dozens of post holes, ensuring perfect alignment, or dealing with tricky corners makes your head spin, there's no shame in bringing in the experts. We're here to help make sure you get a fence that looks great and lasts for years, whether you do it yourself or we lend a hand.